Your organisation and your first project
This guide takes you along the shortest path from a newly created account to your first assigned task. Each step links to the page that explains it in depth. If you do not have an account yet, start with Sign-up and first sign-in.
The route is that of a PM. A Consultant/Developer who accepts an invitation does not create projects: they go straight to My work and see the tasks assigned to them.
What you have at the start
When you sign up, your organisation is created with a factory catalogue (project templates, team roles, currencies, expense types, issue statuses and platforms), but no project, task or person other than you. Your home screen is Projects, with the message “You don't have any projects yet” and the invitation to create the first one. If any term is new to you, see Basic concepts.
1. Create the project
- In Projects, press New project.
- Fill in at least Project name and Client (both are required).
- Under Template, choose the one closest to your work. Its phases are created automatically. If you prefer to build your own, leave “Blank project (no initial phases)”.
- The rest is optional: client contact, Platform / main technology (optional), Budget (hours, optional), planned dates, Notes and Team Leader (optional).
- Press Create project. It takes you to the project, which starts with the Planned status, EUR currency and a code such as
P02600001.
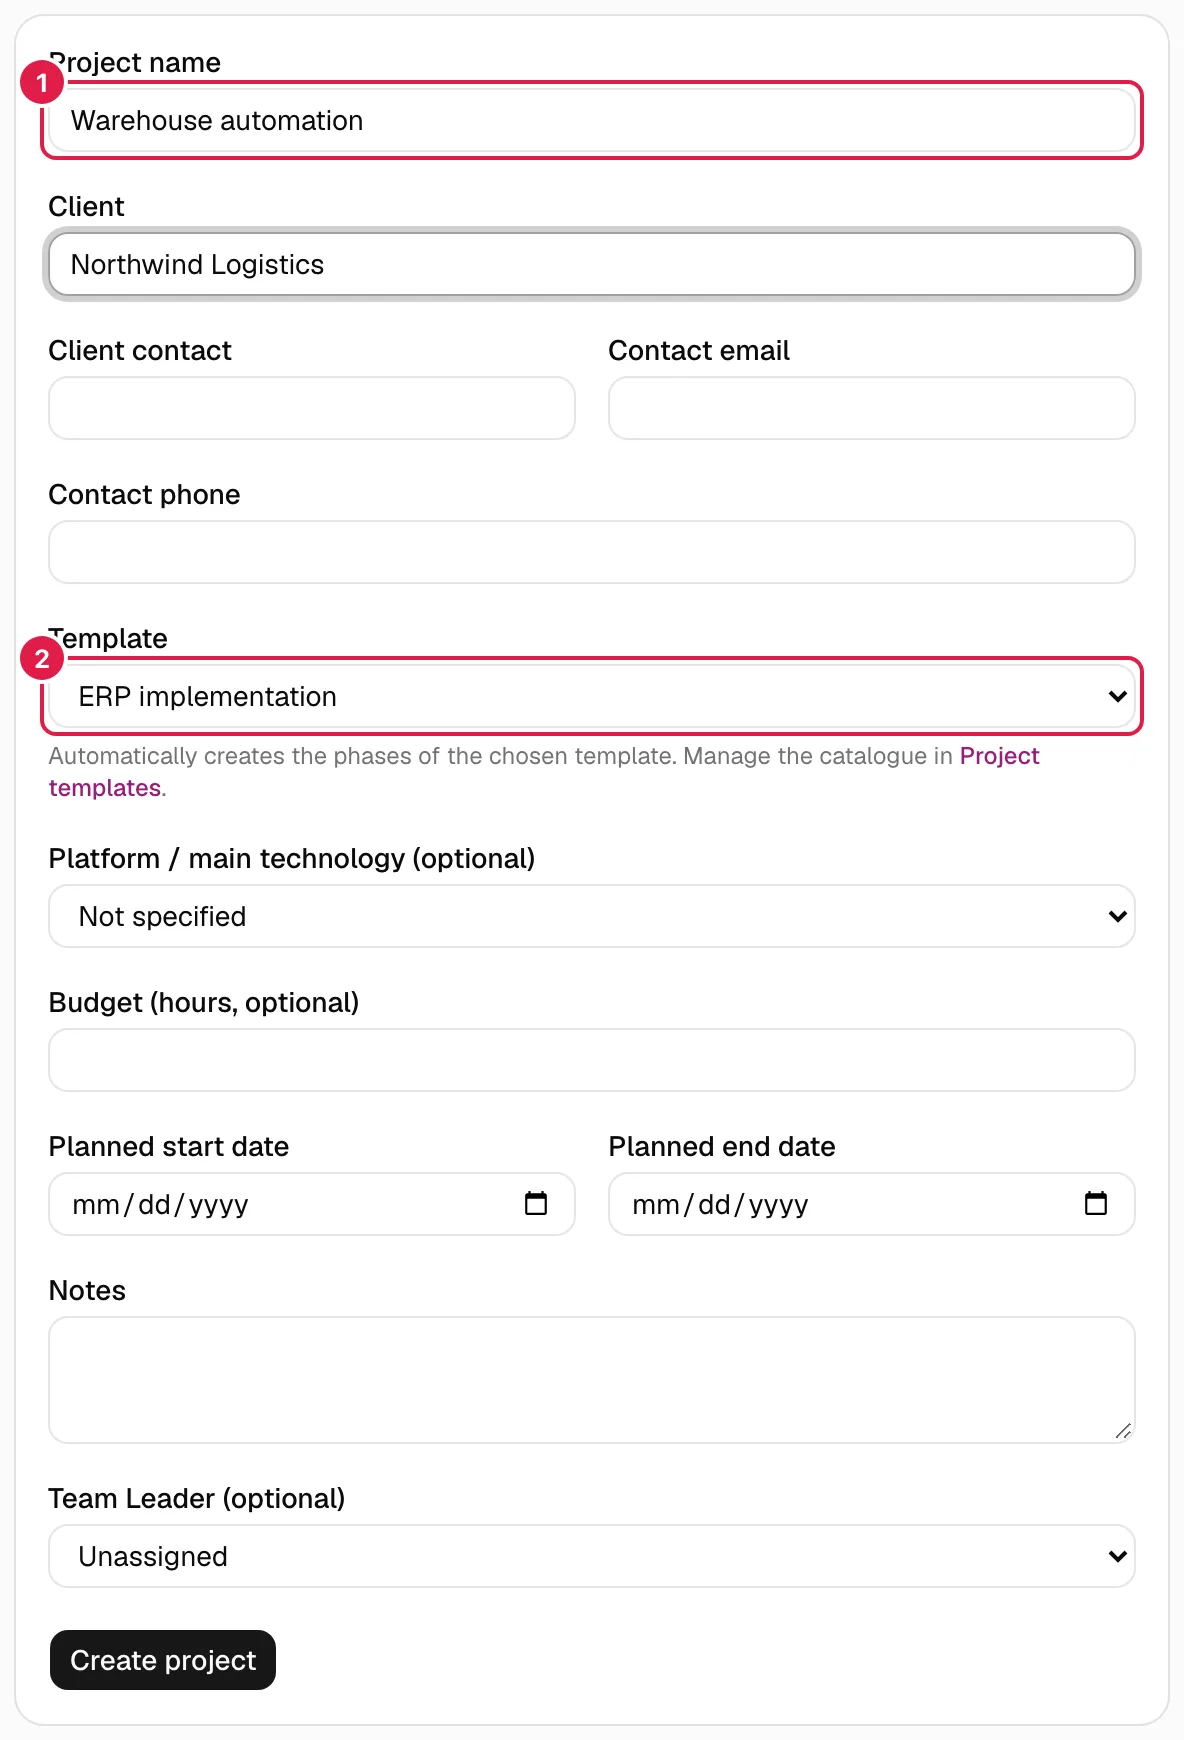
Details of all the fields in Create a project.
2. Review or create the phases
With a template, the Phases tab already shows the phases (for example Analysis, Configuration/set-up…). With a blank project, “This project has no phases yet.” appears: type a name in New phase and press Add phase. You can choose a Parent phase (optional) to create sub-phases. More in Phases and sub-phases.
3. Add the people
To assign work to someone, they first have to be in your organisation and on the project team:
- In People, press + New person. Choose With account (name and email: they receive an invitation) or Without account (name only: they do not sign in, you manage their work). See People.
- In the project's Team tab, add that person with a team role. See Project team.
As the owning PM, you can already receive tasks without any further steps. If you work alone, you can skip this step.
4. Create the first task
- In a phase, press + Task.
- Enter the Title (required). Choose the Initial status (by default it starts with the first one in the list: “To do”) and the Priority (Medium by default).
- Optional: description, Estimated hours (optional), Start date, Due date, deliverable and the Assignees (checkboxes with the project team).
- Press Create task. You return to the project and the task appears in its phase with its code
T0001.
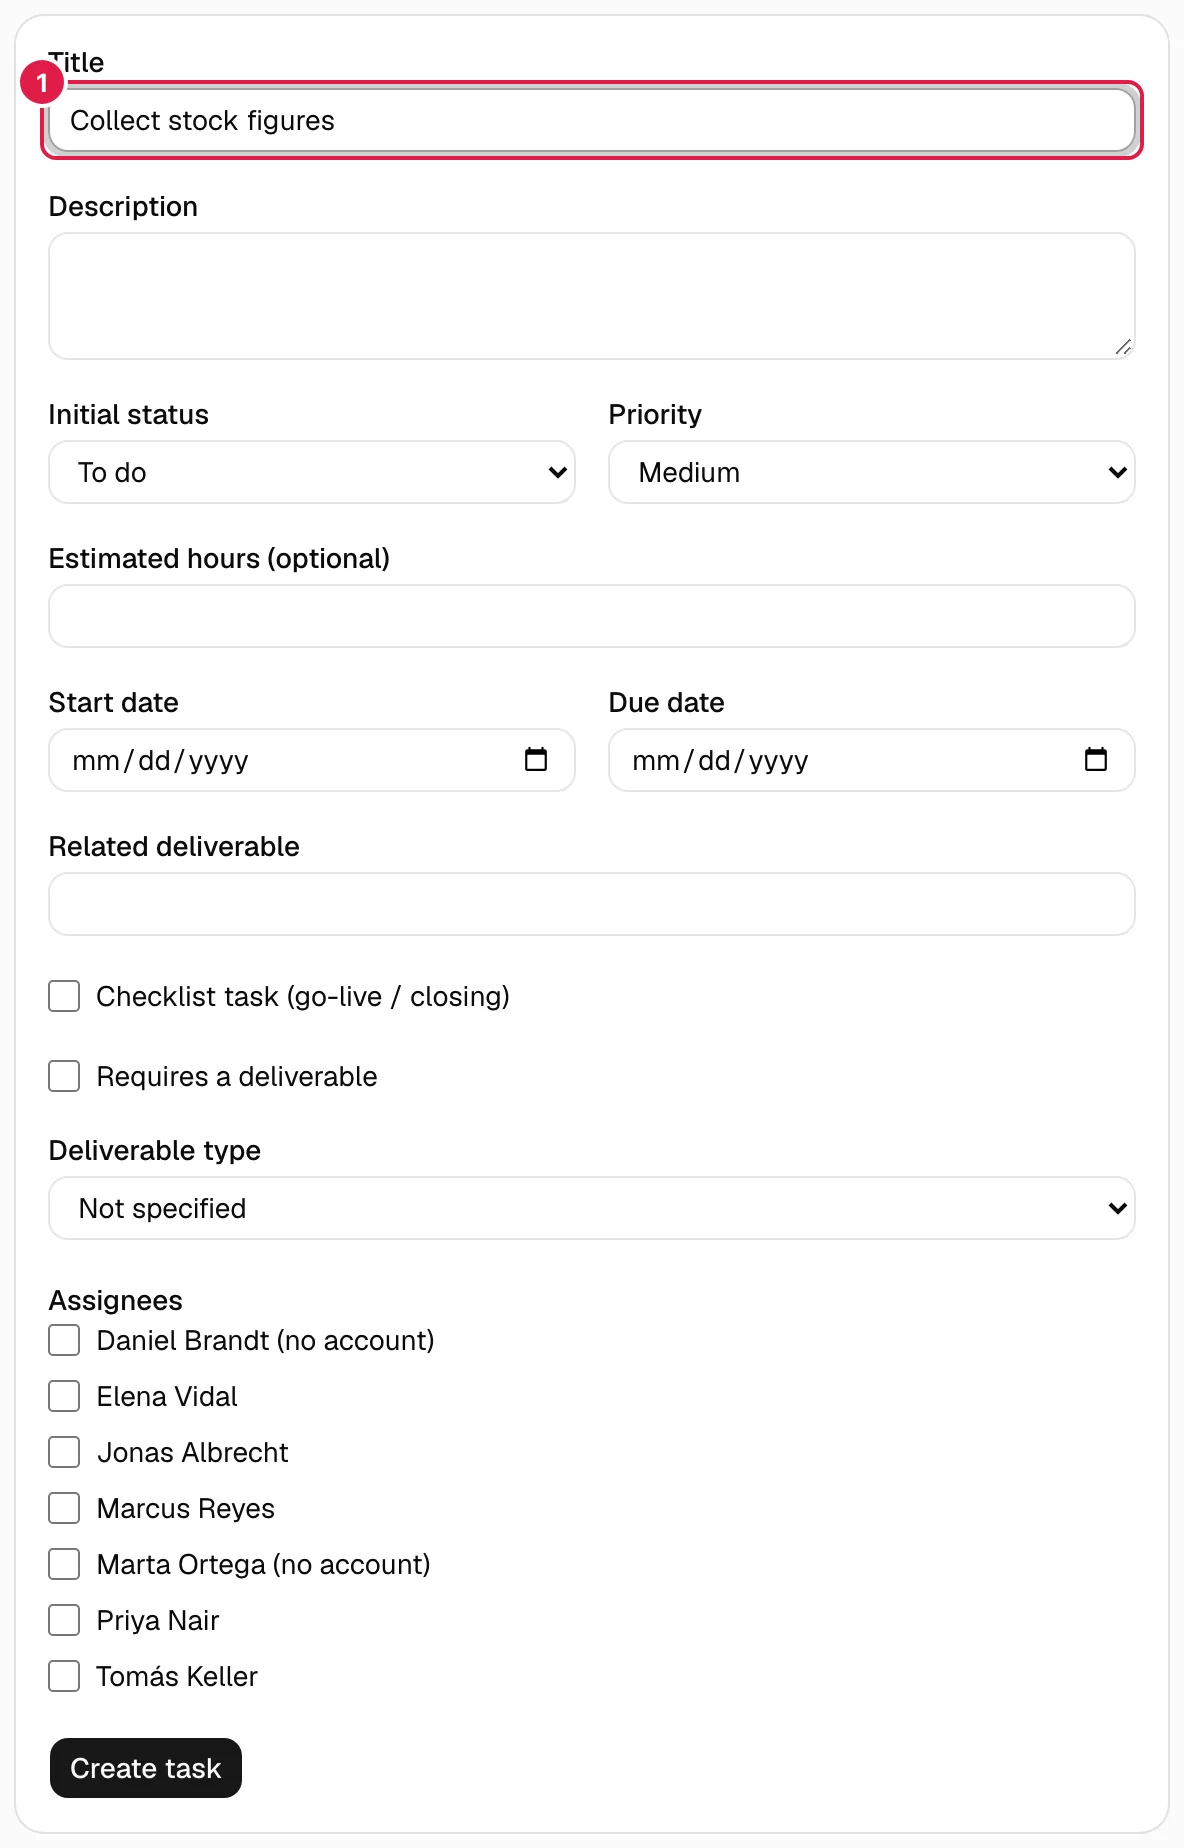
All the fields are in Tasks; assigning, dependencies and checklist are in Assignees, dependencies, checklist and deliverables.
5. And now what?
- Record the work with Time entries and follow progress in the project summary.
- Adapt the catalogues to the way you work in Master data and catalogues.
- Choose a language and theme in Language, theme, time zone and password.
Related topics
Updated 2026-10-08